使用 Amazon Lightsail 在 Windows Server 上部署 ASP.NET Core 应用程序


支持亚马逊云科技免费套餐

亚马逊云科技账户。如果您还没有账户,请按照设置亚马逊云科技环境教程中的说明获取快速概览。要简要了解如何创建账户,请按照创建亚马逊云科技账户中的说明进行操作。
亚马逊云科技凭证:按照访问您的安全凭证中的说明获取您的亚马逊云科技凭证
Git 客户端:按照说明为您的操作系统安装 Git。
已安装 .NET
适用于您操作系统的 Powershell。
本教程中使用的示例代码来自 GitHub


部署应用程序是 IT 专业人员的一项基本任务。《IT 专业人员实用云指南》的“在云中运行”阶段使用 Amazon Lightsail,它是一种托管服务,可托管虚拟专用服务器 (VPS)、容器、数据库、存储和网络。“在云中运行”的目标是在不构建云基础设施的情况下,获得在云中工作的经验。
Lightsail 简介
在本任务中,您将在 Windows Server 中的 IIS 上部署 ASP.NET Core 应用程序。该应用程序是一个简单的 Web 应用程序,但除了部署该应用程序外,还需要安装和配置 IIS。
我们先大概了解一下 Amazon Lightsail,熟悉如何使用该服务。请注意,这只是帮您熟悉该服务的简要介绍。如果您想开始学习本教程,请前往模块 1
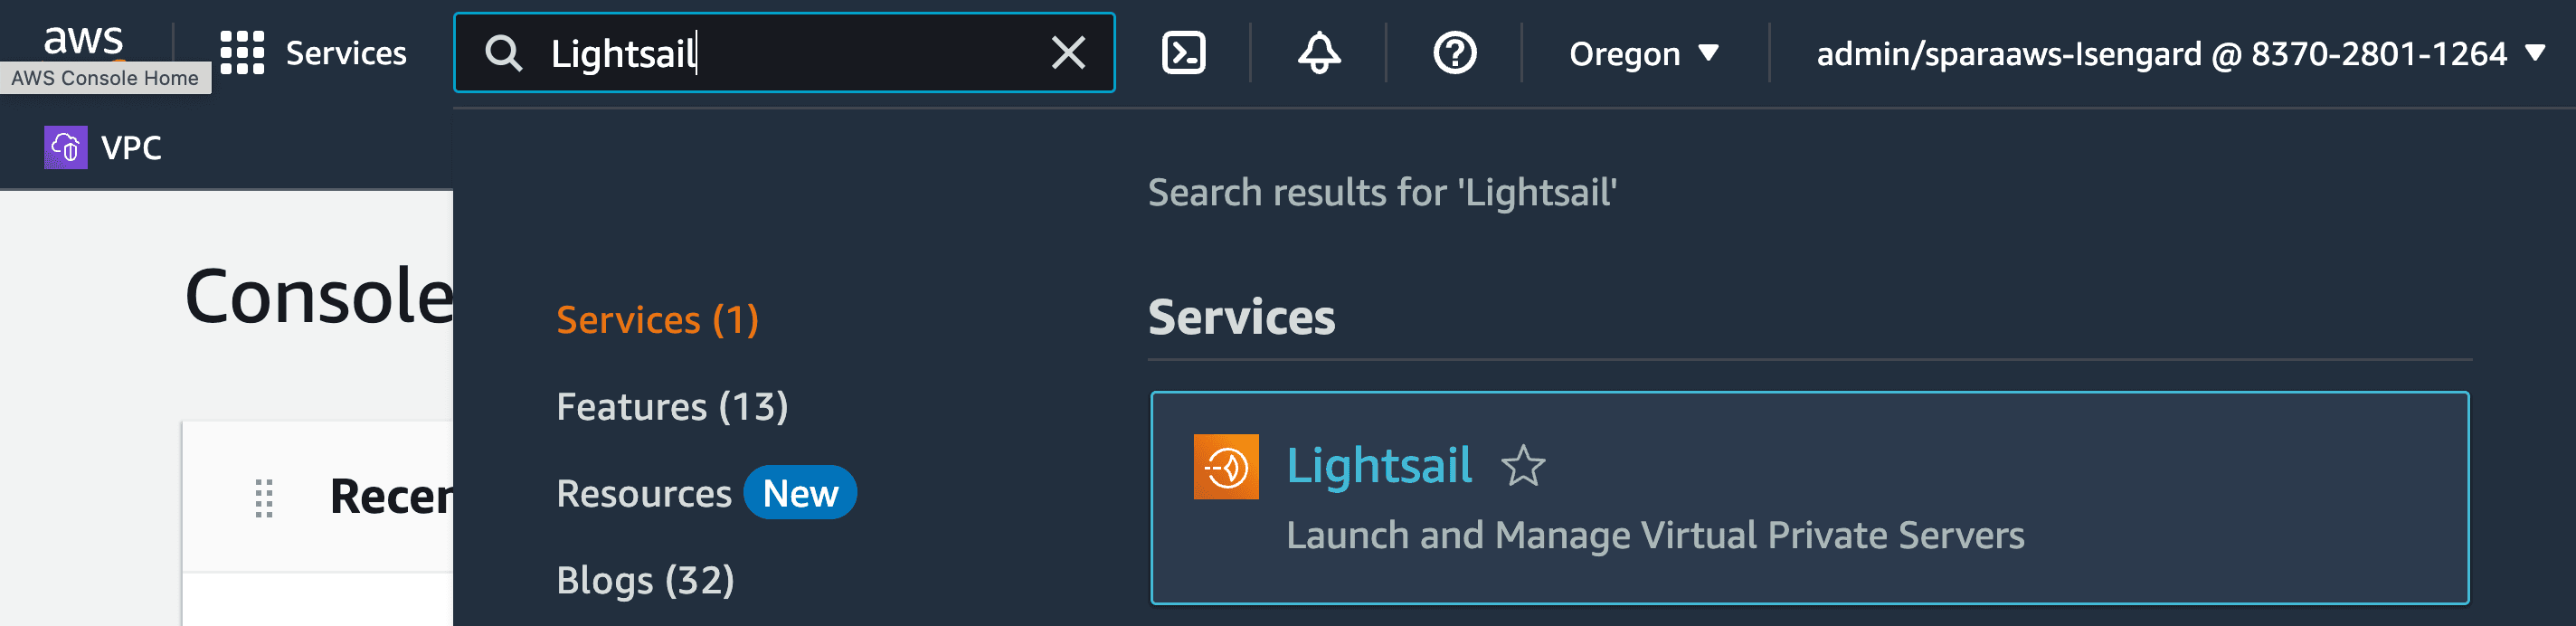
在浏览器中打开亚马逊云科技管理控制台,然后使用搜索栏查找 Amazon Lightsail。
Lightsail 菜单显示 Instances(实例)(即虚拟专用服务器)选项。选择 Instances(实例),然后点击 Create instance(创建实例)。

Create an instance(创建实例)页面包含多个选项。首先,选择 Instance location(实例位置),您可以保留默认值,也可以选择最近的亚马逊云科技区域。其次,为 VPS 选择 Windows Server。第三,选择 OS Only(仅限操作系统)Windows Server 蓝图

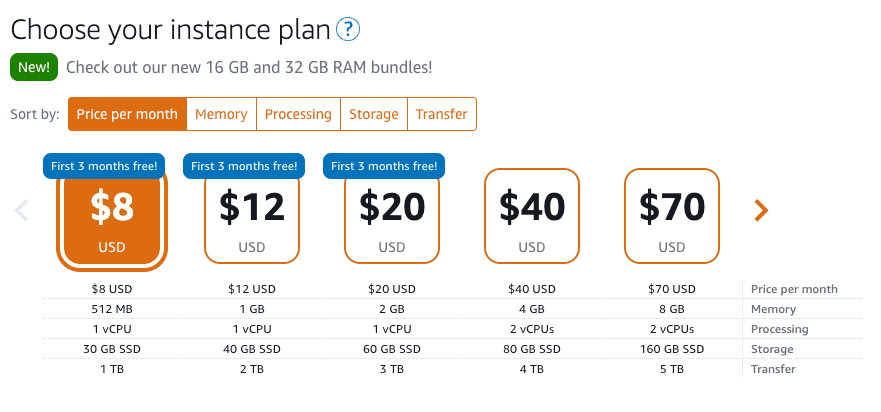
您可以选择实例计划。Lightsail 的优点之一是 VPS 的每月成本是固定的。

以上是 Amazon Lightsail 的简要概述。随着逐步完成各项任务,我们将深入了解 Lightsail 的其他服务。
开始学习
在本教程中,您将创建一个 Windows Server 2022 实例并在 IIS 上部署一个 ASP.NET Core 应用程序
概述
在 DevOps 中,应用程序通常使用持续集成 (CI) 软件构建。代码由开发人员推送到 CI,然后在其中进行构建、测试并发布到云存储。
本教程基于这样一个场景:编译和打包的应用程序已由 CI 进程推送到对象存储 (Amazon S3) 中。我们会模拟将应用程序和 IIS 配置脚本上传至 Amazon S3。请注意,配置脚本用于在 Windows 2022 Server 上部署和配置应用程序,而不是持续交付 (CD) 进程的一部分。
模块 1:克隆存储库并编译
在本模块中,所用软件和部署脚本位于 GitHub 存储库中。您将克隆该存储库以将文件复制到本地驱动器。您将使用 .NET 编译应用程序并将其打包为 zip 文件。
执行说明
步骤 1:克隆 practical-cloud-guide-code 存储库。构建并压缩应用程序。
git clone https://github.com/build-on-aws/practical-cloud-guide-code步骤 2:编译 ASP.NET Core 应用程序。
此步骤将 C# 代码编译为可执行文件并创建 publish 目录。
在 Windows、Linux 或 macOS 中:
cd ./practical-cloud-guide-code/run-to-build/windows-app-deploy/aspnetcoreapp/
dotnet publish -c release步骤 3:将应用程序打包为 zip 文件。
此步骤将所有应用程序文件打包为一个 zip 文件,以便上传至云存储并部署在 Windows Server 上。请注意,在压缩应用程序时,您必须位于 publish 目录中。解压缩该 zip 文件后,所有文件都将位于网站的根目录下。
在 Windows 或 Powershell 中:
cd ./practical-cloud-guide-code/run-to-build/windows-app-deploy/aspnetcoreapp/bin/Release/net6.0/publish
Compress-Archive -Path ./ -DestinationPath ./deploy/app.zip在 Linux 或 macOS 中:
cd ./practical-cloud-guide-code/run-to-build/windows-app-deploy/aspnetcoreapp/bin/Release/net6.0/publish
zip ./windows-app-deploy/deploy/app.zip ./*模块 2:创建 S3 存储桶并上传文件
下一步是创建一个 S3 存储桶,用于存储可由 Windows Server 访问的文件。
执行说明
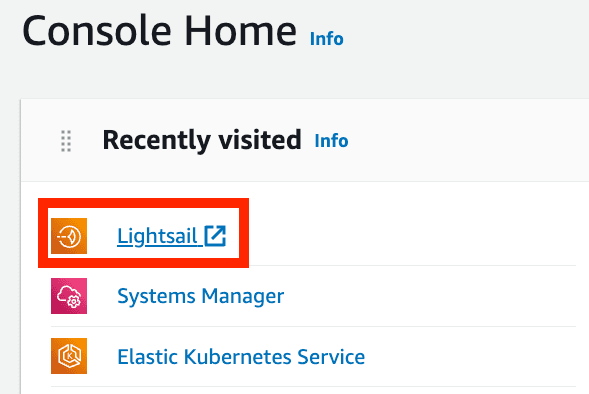
步骤 1:打开亚马逊云科技管理控制台并选择 Lightsail。
步骤 2:创建 S3 存储桶
选择 Storage(存储)。

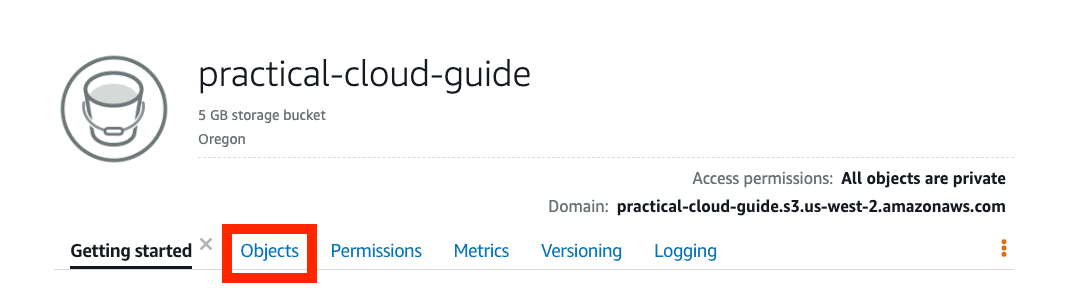
在 Create a new bucket(创建新存储桶)页面中,选择 5GB 存储计划,并使用唯一的名称命名存储桶,例如 <my>-practical-cloud-guide。请注意,存储桶名称必须全局唯一。点击 Create Bucket(创建存储桶)。

您将看到 practical-cloud-guide 存储桶的菜单页面,选择 Objects(对象)。
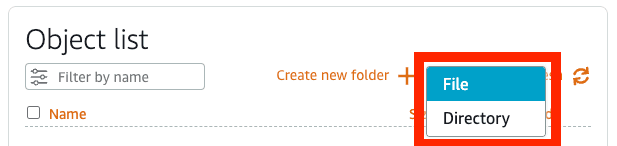
Object list(对象列表)显示存储桶中的对象。点击 Upload(上传),将应用程序和部署文件放入该存储桶。
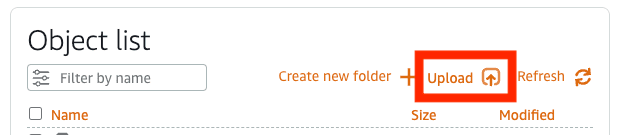
选择 File(文件)。
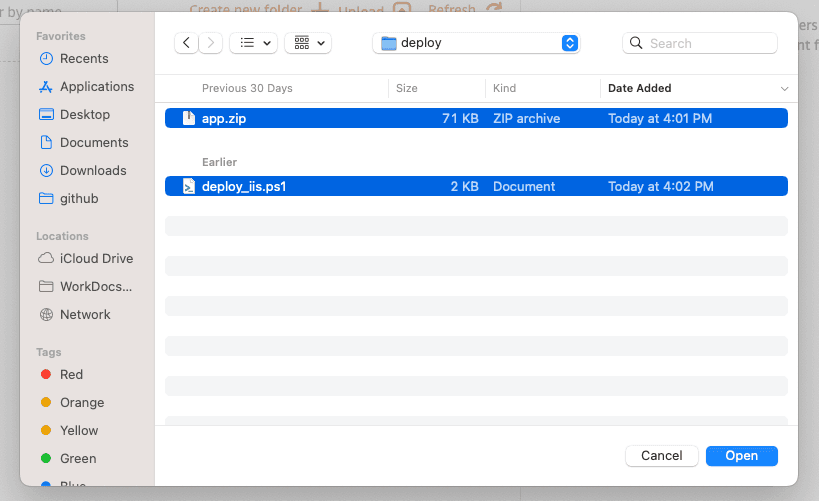
从 ./practical-cloud-guide-code/run-to-build/windows-app-deploy /deploy/ 中选择 app.zip 和 deploy_iis.ps1,然后点击 Open(打开)。
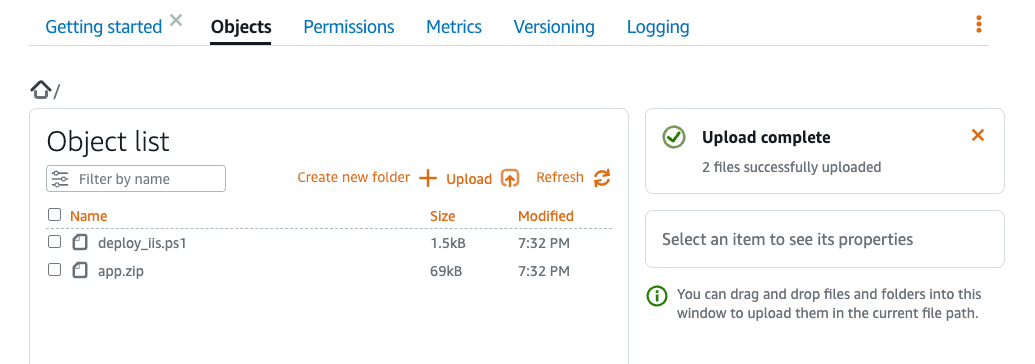
这些文件将添加到 Object list(对象列表)中。
模块 3:部署 Windows 2022 Server
一项常见任务是部署配置了 IIS 的 Windows Server。我们将使用 Amazon Lightsail 控制台实例化 Windows Server 2000,并将其配置为使用 Powershell 脚本安装 .NET Core 和 IIS。
执行说明
步骤 1:部署 Windows Server 2022
点击 Create instance(创建实例)。

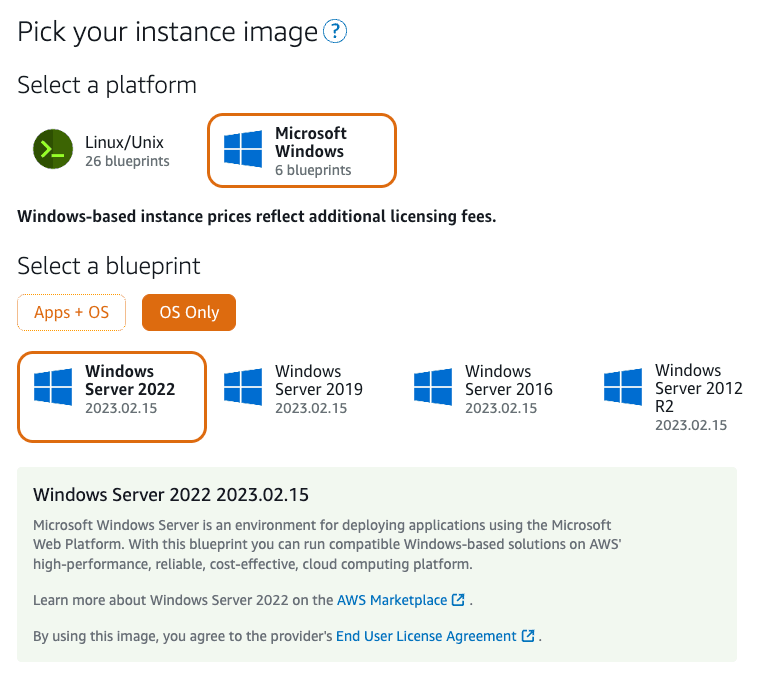
选择 Microsoft Windows,然后选择 Windows Server 2022。
选择实例计划,在本教程中,可以使用最小的计划,但更大的计划响应更快。
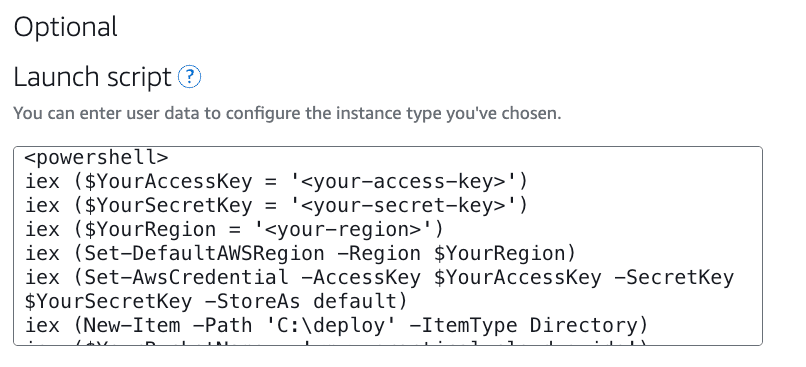
添加一个脚本以创建目录,并下载应用程序和部署脚本。将此脚本复制到 Launch script(启动脚本)输入框中。将访问密钥、安全密钥和区域的值替换为您的账户。
<powershell>
iex ($YourAccessKey = '<your-access-key>')
iex ($YourSecretKey = '<your-secret-key>')
iex ($YourRegion = '<your-region>')
iex (Set-DefaultAWSRegion -Region $YourRegion)
iex (Set-AwsCredential -AccessKey $YourAccessKey -SecretKey $YourSecretKey -StoreAs default)
iex (New-Item -Path 'C:\deploy' -ItemType Directory)
iex ($YourBucketName = '<my>-practical-cloud-guide')
iex ($YourAppKey = 'deploy_iis.ps1')
iex (Copy-S3Object -BucketName practical-cloud-guide -Key deploy_iis.ps1 -LocalFoil C:\deploy\deploy_iis.ps1)
iex (Copy-S3Object -BucketName $YourBucketName -Key $YourAppKey -LocalFile C:\deploy\$YourAppKey)
</powershell>注意:不建议使用访问密钥,但为了完成演示,本教程使用了访问密钥。部署完成后,将删除这些密钥。
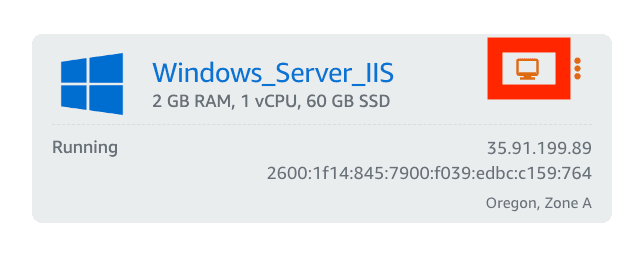
将实例命名为 Windows_Server_IIS。然后,点击 Create Instance(创建实例)。
模块 4:部署 ASP.NET Core 应用程序
在上一个模块中,您使用 Lightsail 创建了一个 Windows 2022 Server。接下来,将为该服务器预配 IIS,并部署用 C# 编写的 Web 应用程序。
本模块将展示如何在 Windows Server 2022 中安装并配置 IIS 以及如何使用 Powershell 脚本从 S3 存储桶部署 ASP.NET Core 应用程序
执行说明
步骤 1:部署 IIS 和 ASP.NET Core 应用程序
deploy_iis.ps1 Powershell 脚本可自动执行安装 IIS 及其管理工具、配置新网站和部署 ASP.NET Core Razor 应用程序的过程。我们先使用内置的远程桌面客户端 (RDP) 登录服务器。选择计算机图标,打开 RDP 窗口。
从 Windows 开始菜单打开 Powershell 终端。将目录更改为 C:\deploy,然后使用记事本查看 deploy_iis.ps1 脚本。
cd C:\deploy
notepad.exe ./deploy_iis.ps1在运行该脚本之前,我们先详细了解一下该脚本。
脚本的第一部分安装 IIS 和管理工具。要托管 ASP.NET Core 应用程序,IIS 需要 ASP.NET Core 6.0 托管包。如需了解关于 IIS 配置的更多信息,请参阅 IIS 文档。请注意,该脚本将 ProgressPreference 设置为 SilentlyContinue,以防止 cmdlet 输出写入终端。
Set-Variable $global:ProgressPreference SilentlyContinue

# Install IIS
Install-WindowsFeature Web-Server -IncludeManagementTools

# Download and install the ASP.NET Core 6.0 Hosting Bundle
$filein = "https://download.visualstudio.microsoft.com/download/pr/7ab0bc25-5b00-42c3-b7cc-bb8e08f05135/91528a790a28c1f0fe39845decf40e10/dotnet-hosting-6.0.16-win.exe"
Invoke-WebRequest -Uri $filein -OutFile "$(pwd)\dotnet-hosting-6.0.16-win.exe"

Start-Process -FilePath "$(pwd)\dotnet-hosting-6.0.16-win.exe" -Wait -ArgumentList /passive

# Stop and start IIS
net stop was /y
net start w3svc脚本的第二部分为应用程序创建一个目录。该脚本从前面创建的 S3 存储桶下载 app.zip,并将其解压缩到该目录下。
# download and unzip the application
New-Item -Path 'C:\inet\newsite' -ItemType Directory
$YourBucketName = "<my>-practical-cloud-guide"
$AppKey = "app.zip"
$AppFile = "C:\inet\newsite\" + $AppKey
Copy-S3Object -BucketName $YourBucketName -Key $AppKey -LocalFile $AppFile
Expand-Archive $AppFile -DestinationPath "C:\inet\newsite"脚本的第三部分禁用默认的 IIS 网站,配置新的应用程序池、网站,并部署应用程序。如果脚本成功运行,将打开 Microsoft Edge 并显示应用程序。有关网站配置,请参阅 Microsoft 文档。
在脚本的最后,删除您的亚马逊云科技凭证。删除凭证是一种安全做法,因为服务器不需要访问其他亚马逊云科技服务或资源。在后续的教程中,您将学习如何使用 Identity and Access Management (IAM) 服务构建具有临时凭证的基础设施。
# Create application pool
$appPoolName = 'DemoAppPool'
New-WebAppPool -Name $appPoolName -force

# Create website
New-Item IIS:\Sites\DemoSite -physicalPath C:\inet -bindings @{protocol="http";bindingInformation=":8080:"}
Set-ItemProperty IIS:\Sites\DemoSite -name applicationPool -value $appPoolName

# Add application to website
New-Item IIS:\Sites\DemoSite\DemoApp -physicalPath C:\inet\newsite -type Application
Set-ItemProperty IIS:\sites\DemoSite\DemoApp -name applicationPool -value $appPoolName

# start new website
Start-WebAppPool -Name $appPoolName
Start-WebSite -Name "DemoSite"

# Open application on Edge
start microsoft-edge:http://localhost:8080/DemoApp

# delete AWS credentials
Remove-AWSCredentialProfile -Force -ProfileName default运行脚本,完成安装和部署。
C:\deploy\deploy_iis.ps1清理资源
为避免产生额外费用,请删除 Windows Server 2022。删除 S3 存储桶是可选操作。您可以保留 S3 存储桶,用于其他教程。
步骤 1:删除 Windows Server 2022
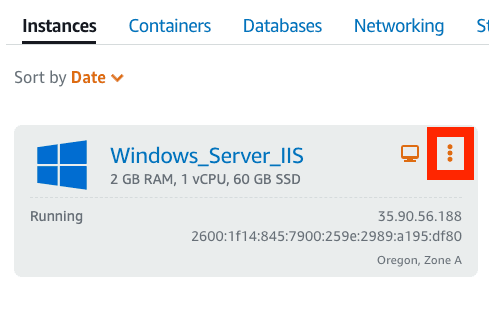
在 Lightsail 菜单中选择 Instances(实例),然后选择三个红点。
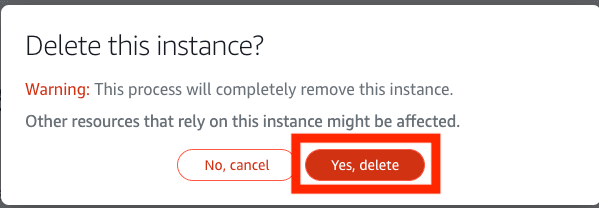
选择 Delete(删除)。
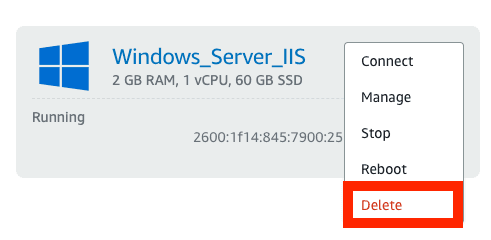
选择 Yes, delete(是的,删除)。
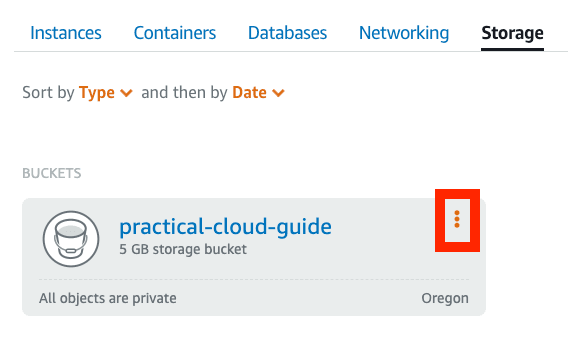
步骤 2:删除 S3 存储桶(可选)
在 Lightsail 菜单上选择 Storage(存储)。点击三个垂直点。
选择 Delete(删除)。
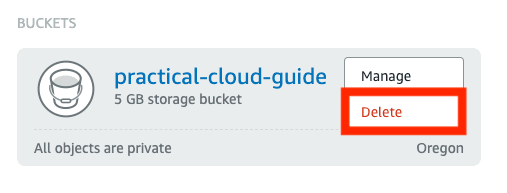
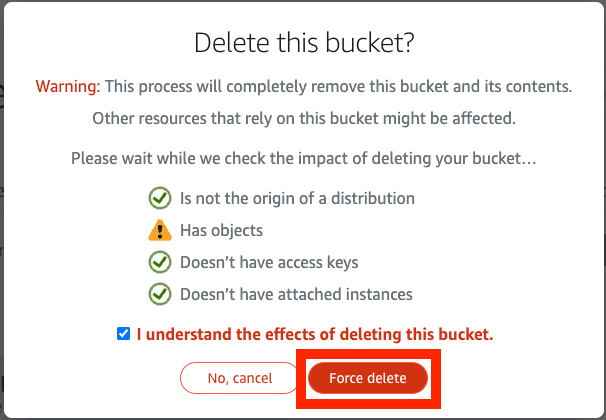
选择 Force Delete(强制删除),删除文件和 S3 存储桶。
总结
您创建的第一个云资源是 S3 存储桶,用于存储云服务可访问的文件。S3 是一种对象存储,不同于支持文件读写的文件系统。您必须将文件从 S3 复制到 Windows Sever 才能使用。
您创建的第二个云资源是运行 Windows Server 2022 的虚拟专用服务器。Lightsail 服务在亚马逊云科技中预配网络服务,以支持连接到 S3 等其他服务。Windows Server 实例包括用于 Amazon Tools for Powershell,通过添加凭证,您可以访问其他亚马逊云科技服务。
deploy_iis.ps1 Powershell 脚本展示了如何使用熟悉的脚本工具和命令在与亚马逊云科技资源交互时自动配置 IIS 等 Windows 服务。虽然这是一个简单的示例,但展示了如何用脚本在 DevOps 工作流中实现持续部署。在后面的文章中,我们将介绍如何构建持续集成/持续部署管道以自动交付应用程序。
后续操作
在《实用云指南》的下一篇文章中,您将使用 Amazon Lightsail 在 Linux 服务器上部署 Java 应用程序,请访问以下链接。
▶ 使用 Amazon Lightsail 在 Windows Server 上部署 ASP.NET Core 应用程序

